Can I make letter photo frames with an alphabet silicone mold?
As a supplier of Alphabet Silicone Molds, I often get asked about the diverse applications of these molds. One question that has piqued my interest lately is whether one can make letter photo frames using an alphabet silicone mold. The answer is a resounding yes! In this blog post, I'll delve into the process, benefits, and creative possibilities of using alphabet silicone molds to craft unique letter photo frames.
Understanding Alphabet Silicone Molds
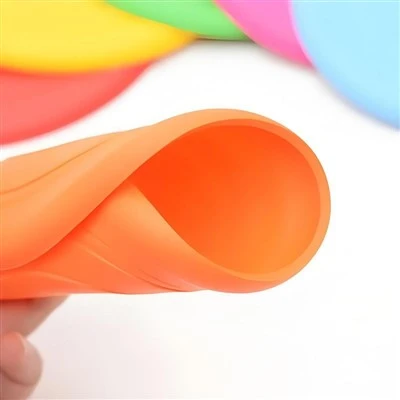
Alphabet silicone molds are a versatile tool in the world of crafting. They are typically made from high - quality silicone, which is flexible, durable, and heat - resistant. The silicone material allows for easy release of the finished product, and it can withstand repeated use. These molds come in various sizes, styles, and fonts, giving you a wide range of options to choose from for your letter photo frame project.


Materials Needed
To make letter photo frames with an alphabet silicone mold, you'll need the following materials:
- Alphabet Silicone Mold: Of course, this is the star of the show. Select a mold with the letters you need for your photo frame and a font that suits your aesthetic.
- Casting Material: You can use a variety of casting materials such as resin, plaster, or polymer clay. Resin is a popular choice as it gives a clear, glossy finish, but plaster is more budget - friendly and easier to work with for beginners.
- Pigments or Dyes: If you want to add color to your letter photo frames, you can use pigments or dyes specifically designed for your chosen casting material.
- Photo Frame Backing: You'll need a backing for your photo, such as a piece of cardboard or a wooden frame.
- Adhesive: To attach the letters to the backing, you'll need a suitable adhesive. For resin or plaster letters, epoxy glue works well.
- Optional Tools: Depending on your casting material, you may need tools like a mixing cup, stir stick, and a heat gun to remove air bubbles from the resin.
The Process of Making Letter Photo Frames
- Prepare the Casting Material: If you're using resin, follow the manufacturer's instructions to mix the resin and hardener. Add any pigments or dyes at this stage and mix thoroughly. If using plaster, mix it with water according to the package directions.
- Fill the Silicone Mold: Pour the prepared casting material into the alphabet silicone mold. Make sure to fill each letter cavity completely and tap the mold gently on a flat surface to remove any air bubbles.
- Let it Cure: Allow the casting material to cure according to the recommended time. This can range from a few hours for plaster to 24 - 48 hours for resin.
- Remove the Letters from the Mold: Once the casting material has cured, gently flex the silicone mold to release the letters. The flexibility of the silicone makes this process relatively easy.
- Prepare the Photo Frame Backing: Cut the backing to the appropriate size for your photo. You can paint or decorate the backing if you like.
- Attach the Letters: Apply adhesive to the back of each letter and carefully place them on the backing in the desired arrangement. Let the adhesive dry completely.
- Insert the Photo: Finally, place your photo behind the letter - adorned backing, and your letter photo frame is complete!
Benefits of Using Alphabet Silicone Molds for Photo Frames
- Customization: You can create personalized photo frames with specific words or names. This makes them perfect for gifts or to add a personal touch to your home decor.
- Cost - Effective: Compared to buying pre - made photo frames, making your own with silicone molds can be much more budget - friendly, especially if you already have the basic crafting supplies.
- Learning Experience: It's a fun and educational project that allows you to learn new crafting skills, such as casting and resin work.
Creative Possibilities
The possibilities for creating letter photo frames with alphabet silicone molds are endless. You can:
- Mix and Match Fonts: Combine different fonts to create a unique, eclectic look.
- Add Embellishments: You can add rhinestones, beads, or glitter to the letters for a more glamorous effect.
- Create Themed Frames: For example, if you're making a photo frame for a beach vacation, you can use a sandy - colored resin and add seashells or starfish to the letters.
Other Silicone Products for Your Kitchen and Home
In addition to alphabet silicone molds, we also offer a range of other high - quality silicone products. Check out our Silicone Basting Brush, which is perfect for evenly applying sauces and oils while cooking. Our Anti Slip Placemats are not only functional but also add a modern touch to your dining table. And if you're interested in more silicone mold projects, our Silicone Molds for Epoxy are great for creating all sorts of decorative items.
Conclusion
Making letter photo frames with an alphabet silicone mold is a rewarding and creative project that anyone can undertake. Whether you're a seasoned crafter or just starting out, these molds offer a simple and cost - effective way to add a personal touch to your photos. If you're interested in purchasing alphabet silicone molds or any of our other silicone products, we'd love to hear from you. Contact us to discuss your needs and start your next crafting adventure!
References
- Crafting with Silicone Molds: A Beginner's Guide. Published by Crafting World Magazine.
- Resin Casting Handbook. By Resin Experts Inc.
- Polymer Clay Projects for Home Decor. Authored by DIY Decor Lovers.